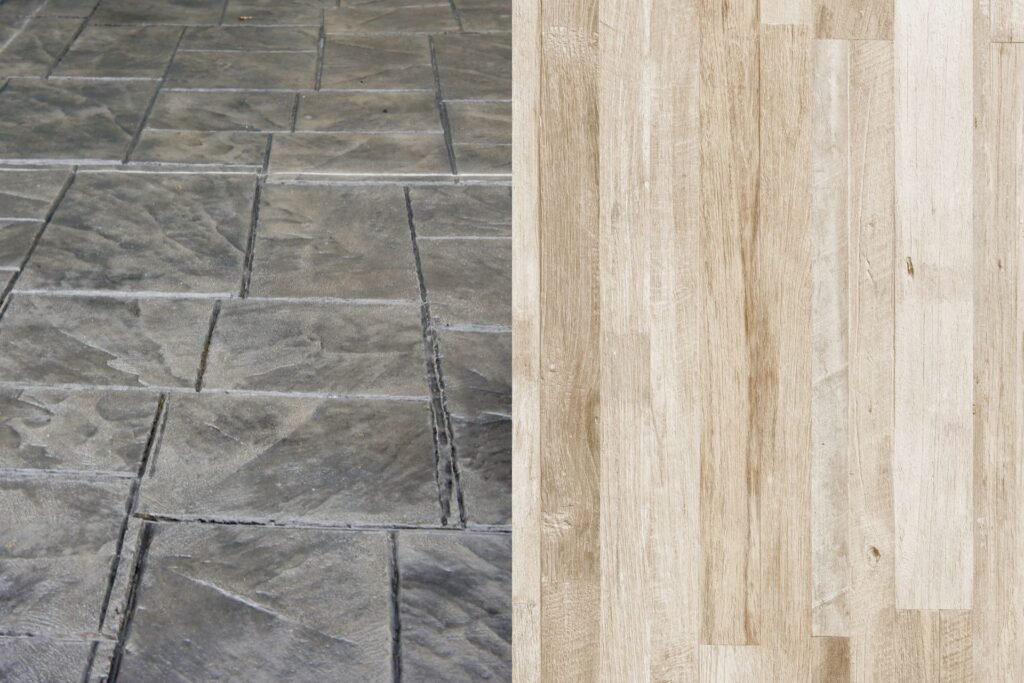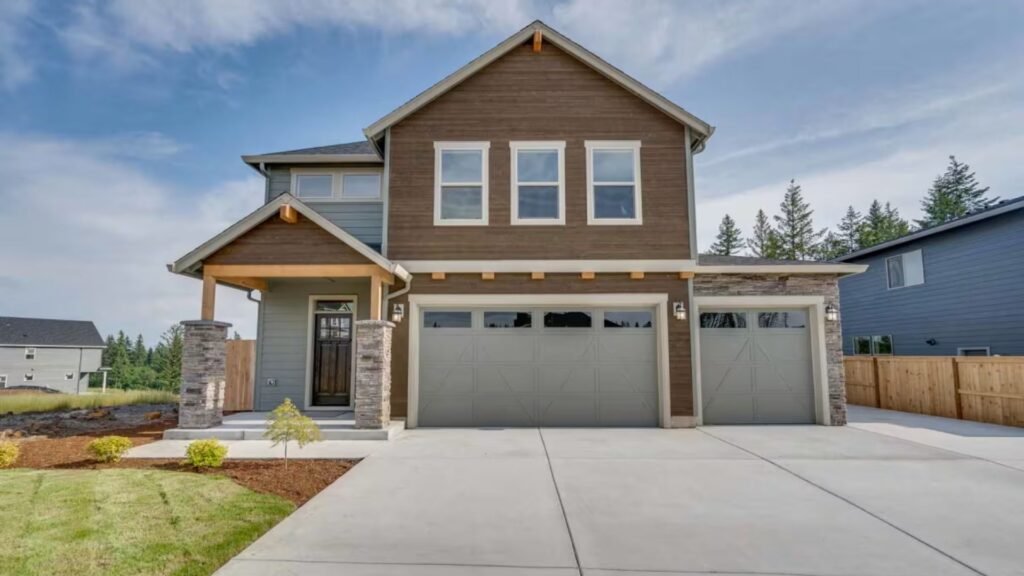
Welcome to your go-to guide on using concrete for pavers in NZ. Whether you’re building a patio, driveway, or walkway, the base you choose will decide how long your pavers last. Concrete isn’t just for big jobs, it’s a smart option for anyone wanting stability, strength, and low maintenance over time. In New Zealand, where soil conditions and weather can be unpredictable, getting the foundation right is critical. This guide breaks down everything you need to know about concrete for pavers, what type to use, when it’s worth the effort, and how to avoid costly mistakes, so you can start your project with confidence.
The best concrete for pavers in NZ is a standard 20 MPa mix, ideal for driveways, patios, and paths. It offers strong support, handles heavy loads, and suits New Zealand’s varied weather. For quick DIY projects, pre-mixed bags from local suppliers like Mitre 10 or Bunnings are a convenient choice.
Table of Contents
Why Concrete Matters For Pavers
When planning a paving project, many people focus only on the visible surface, choosing the right type of pavers, the layout, and the color scheme. But what lies beneath is just as important. The base, especially when made of concrete, is the key to long-lasting, safe, and attractive paving. In New Zealand, where the weather can shift quickly and soil conditions vary from region to region, a solid concrete foundation helps prevent future issues.
What happens if you skip the concrete base? You might save time and money upfront, but problems will show up later. Pavers laid on soft soil or an unstable base are likely to shift, settle unevenly, or even crack. Rain can wash away loose materials under the pavers, creating empty pockets. Over time, this leads to sagging surfaces, trip hazards, and costly repairs.
Concrete adds essential strength and support. It keeps your pavers in place, even under pressure from foot traffic, vehicles, or heavy garden furniture. Unlike sand or gravel alone, concrete holds firm and resists erosion. It also supports proper drainage when sloped correctly, preventing water from pooling or seeping underneath the surface. A well-set concrete base reduces movement and helps your paving stay level for years.
Consider this real-life example. A homeowner in Auckland installed a new driveway using concrete pavers but skipped the concrete base to cut costs. Within a year, they noticed uneven sections and water pooling in one corner after heavy rain. Eventually, some pavers cracked, and the driveway had to be redone, with a concrete base this time. The lesson: skipping the right foundation costs more in the long run.
If you’re serious about durability, stability, and safety, concrete is the smart choice for your paver base. It provides a foundation that lasts, and that’s one part of your project you’ll never want to redo.
Types Of Concrete Mix For Pavers
Choosing the right type of concrete mix is key to building a solid foundation for your pavers. In New Zealand, the ground can shift, the weather can vary, and not all paving projects need the same level of strength. That’s why it’s important to understand the options available, so you can match the mix to your project needs. Whether you’re working on a backyard path or a heavy-use driveway, getting the mix right ensures your pavers stay level, safe, and strong for years to come.
Plain Concrete vs. Reinforced Concrete
Plain concrete is the most commonly used mix for small paving jobs like walkways, garden paths, and patios. It’s made up of cement, sand, gravel, and water. It provides a good level of strength for low-traffic areas and is easier to work with if you’re doing it yourself. On the other hand, reinforced concrete includes steel mesh or rebar to give it extra strength. This type is ideal for driveways, sloped areas, or any surface that will carry the weight of vehicles. It helps prevent cracking over time and is more resistant to shifting or sinking.
Quick Set vs. Traditional Curing Concrete
Quick-set concrete is designed to harden fast, usually within 20 to 40 minutes. It’s perfect for small fixes or tight timelines, but it offers less workability and may not be ideal for large surfaces. Traditional curing concrete takes longer to set, typically 24 to 48 hours for basic handling and up to 28 days to reach full strength. While it takes more time, it’s better suited for most paving projects that require a stable, long-lasting base. For beginners or larger areas, traditional curing gives more flexibility to adjust and level as you go.
Pre-Mixed Bag Options Available In NZ
For DIY projects, pre-mixed concrete bags are a convenient solution. You can find them in nearly every major hardware store in New Zealand, including Bunnings, Mitre 10, and PlaceMakers. These bags contain a balanced blend of cement, sand, and gravel, you just need to add water. They’re available in different strengths and setting times, so always read the label carefully. For small patio areas or minor repairs, a few bags might be all you need. For larger jobs, ordering ready-mix concrete by the cubic metre could be more cost-effective.
What To Look For On The Label (MPa Strength Rating, Drying Time)
When buying concrete, whether in bags or ready-mix, always check the MPa rating. MPa stands for megapascal, which measures compressive strength. For general paver work in NZ, a 20 MPa mix is a safe and reliable choice. It offers a good balance of strength and ease of use. For driveways or commercial areas, consider 25 MPa or higher. Also, look at the drying or curing time listed on the product. Quick-set mixes will list minutes or hours, while traditional mixes will list 24 hours to several days. Picking the right setting time helps you plan your work without rushing or delaying the next steps.
By understanding the different types of concrete mix, you can make smarter decisions for your paver project. Whether you want speed, strength, or ease of use, there’s a mix that fits your needs, and your timeline.
When To Use Concrete For Paving
Using concrete as a base for paving isn’t always necessary, but in certain situations, it can make all the difference in how long your surface lasts and how well it performs. Here’s when concrete is the smarter choice.
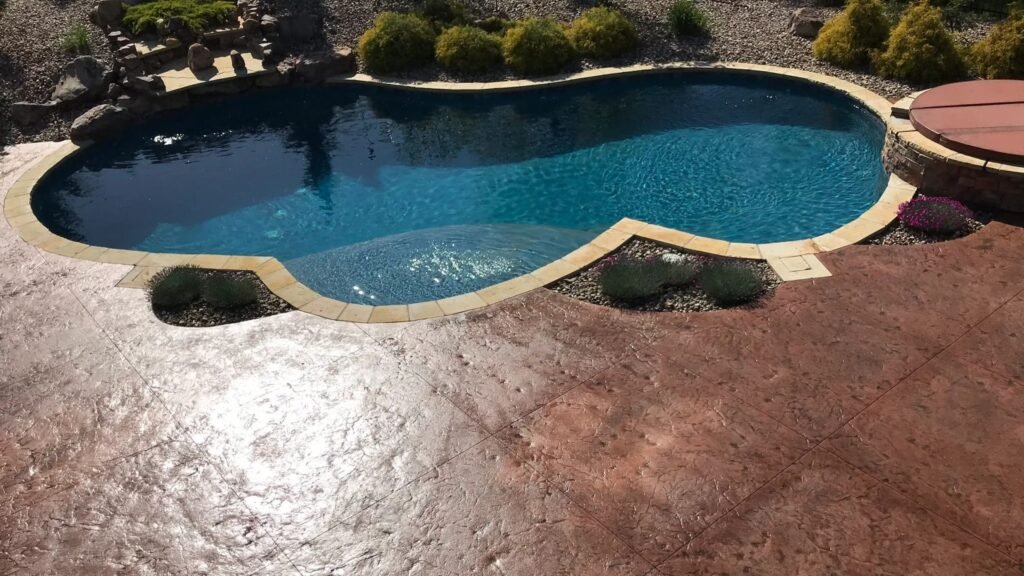
For Heavy Load Areas (Driveways, Patios)
If you’re paving a driveway, patio, or any area where cars, trailers, or heavy foot traffic are expected, concrete is the best foundation. It provides a stable, non-shifting base that holds up under pressure. In New Zealand, where soil conditions can vary and rainfall can weaken loose bases, concrete helps prevent pavers from sinking, cracking, or becoming uneven. A solid concrete base ensures your surface stays flat, even under repeated stress.
On Sloped Or Unstable Ground
If your project is on a slope or an area with soft or unstable soil, laying pavers on a sand base could cause shifting over time. Rain and gravity can wash away the base or cause parts of it to sink. Concrete locks everything in place. It acts like an anchor that holds the pavers steady and resists movement, even during seasonal changes. This is especially useful in hillside properties or coastal regions where erosion is common.
For Long-Term, Low-Maintenance Results
One of the biggest benefits of using concrete for paving is the reduced need for upkeep. Unlike sand bases, which can shift, compact, or wash out over time, a concrete base stays firm. You won’t have to worry about re-levelling pavers every few years. It also helps stop weeds from growing through the gaps, which means less time spent on maintenance and more time enjoying your outdoor space.
When Not To Use It (E.g., Loose-Fill Paths)
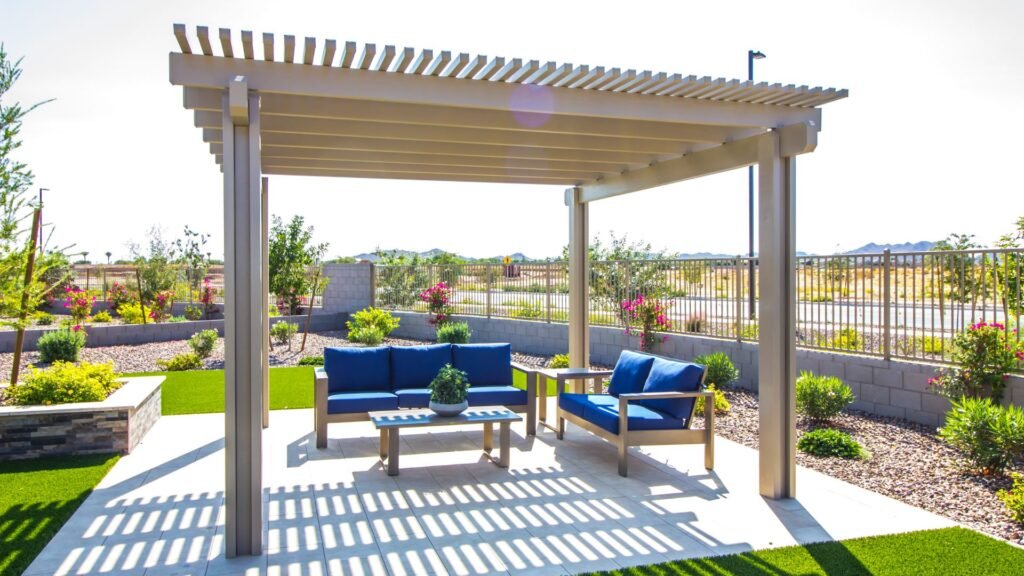
Concrete isn’t always the right option. If you’re installing a small garden path, a decorative walkway, or anything that doesn’t bear much weight, a sand or gravel base might be enough. These options are cheaper, easier to install, and better for areas where water needs to drain freely. Loose-fill paths also give you more flexibility if you want to adjust the layout later on. In these cases, concrete may be overkill and add unnecessary cost to the project.
Using concrete wisely depends on the size, location, and purpose of your paving job. If you’re aiming for durability, stability, and minimal upkeep, concrete is worth the extra effort. But for smaller, decorative jobs, a more flexible base might serve you just as well.
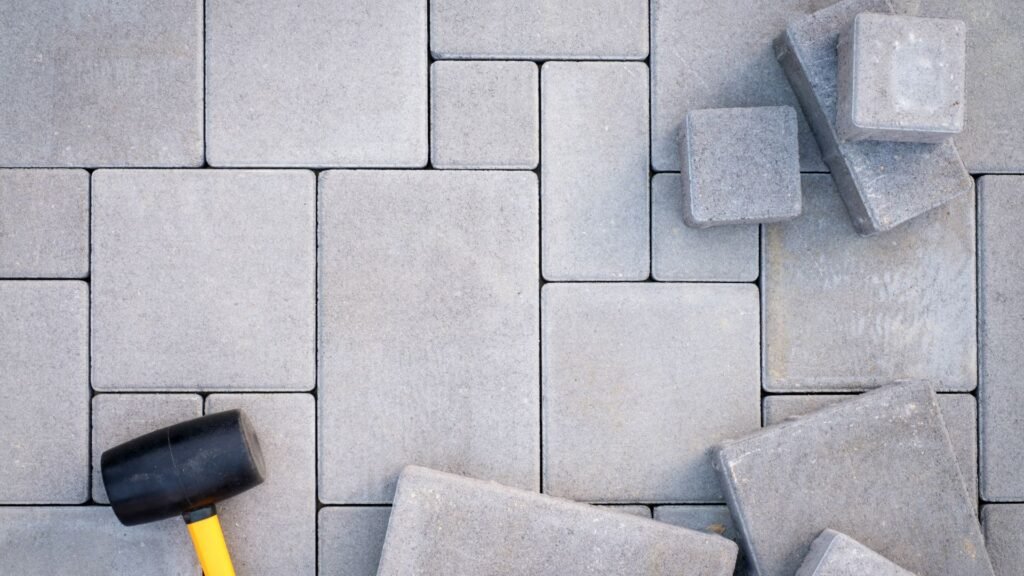
Concrete Base Vs. Sand Base: What’s Best?
When planning to lay pavers in New Zealand, one of the first decisions you’ll face is whether to use a concrete base or a sand base. Both methods are common, but the right choice depends on your project’s purpose, location, and long-term expectations. Let’s break down the key differences, benefits, and common misconceptions so you can make an informed decision that suits your needs.
Pros And Cons Of Each
Concrete Base Pros:
- Provides a strong, permanent foundation
- Ideal for driveways and high-traffic areas
- Reduces risk of shifting, sinking, or weed growth
- Withstands heavy weight and wet conditions
Concrete Base Cons:
- More labour-intensive to install
- Takes time to cure (usually at least 7 days)
- Less forgiving for mistakes, harder to rework once set
- Higher upfront cost compared to sand
Sand Base Pros:
- Easier and quicker to install
- Allows for better drainage in dry areas
- Easier to make adjustments during the paving process
- Cost-effective for small paths or decorative areas
Sand Base Cons:
- More prone to shifting or sinking over time
- Not ideal for heavy loads or frequent use
- Can allow weed growth between pavers
- Needs regular maintenance and re-levelling
Side-By-Side Comparison Table
| Feature | Concrete Base | Sand Base |
| Load Bearing Capacity | High (ideal for vehicles) | Low to Medium |
| Installation Time | Slower (needs curing) | Faster and easier |
| Durability | Long-lasting | Shorter lifespan |
| Maintenance | Low | Medium to high |
| Cost | Higher upfront | Lower initial cost |
| Best For | Driveways, patios | Garden paths, light-use |
Best Base For Different NZ Climates
- Wet South Island Regions (e.g., West Coast, Southland):
Concrete is usually the better choice. Frequent rain and soft soils mean sand can wash out or shift easily. A solid concrete base offers long-term reliability. - Dry North Island Areas (e.g., Hawke’s Bay, Bay of Plenty):
Sand bases work fine for light-use areas like garden paths or small patios. The lower rainfall and firmer ground make sand more stable here, though concrete is still better for driveways or larger projects. - Urban Zones (e.g., Auckland, Wellington):
Both bases are used, depending on the project. Concrete is preferred for high-traffic spaces, while sand may be used in low-impact zones or for decorative paver designs.
In short, there’s no one-size-fits-all answer. Your decision should depend on the expected use, climate, and how much maintenance you’re prepared to do. If you want lasting results with minimal upkeep, concrete is usually the safer bet, especially in wetter parts of NZ.
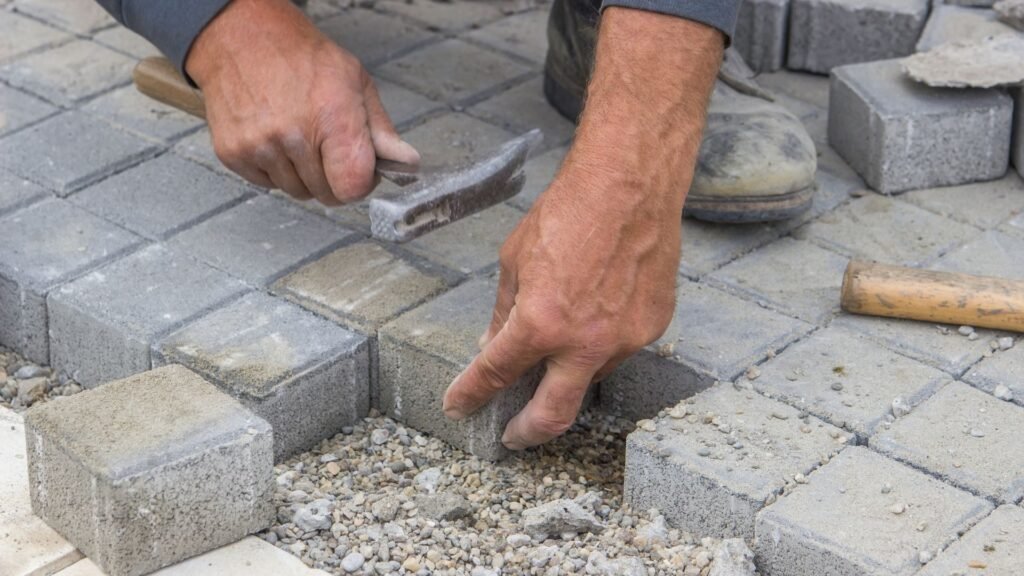
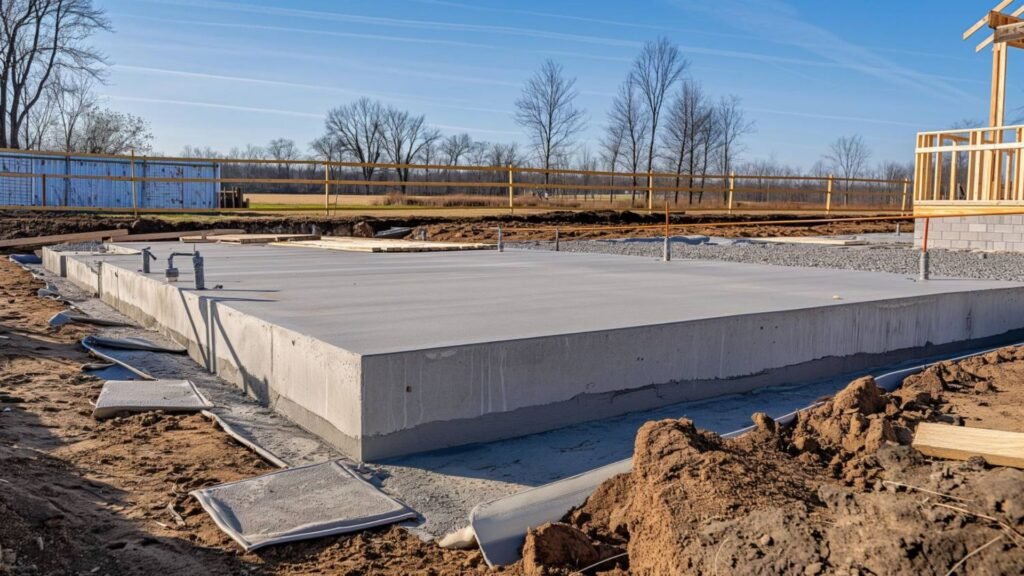
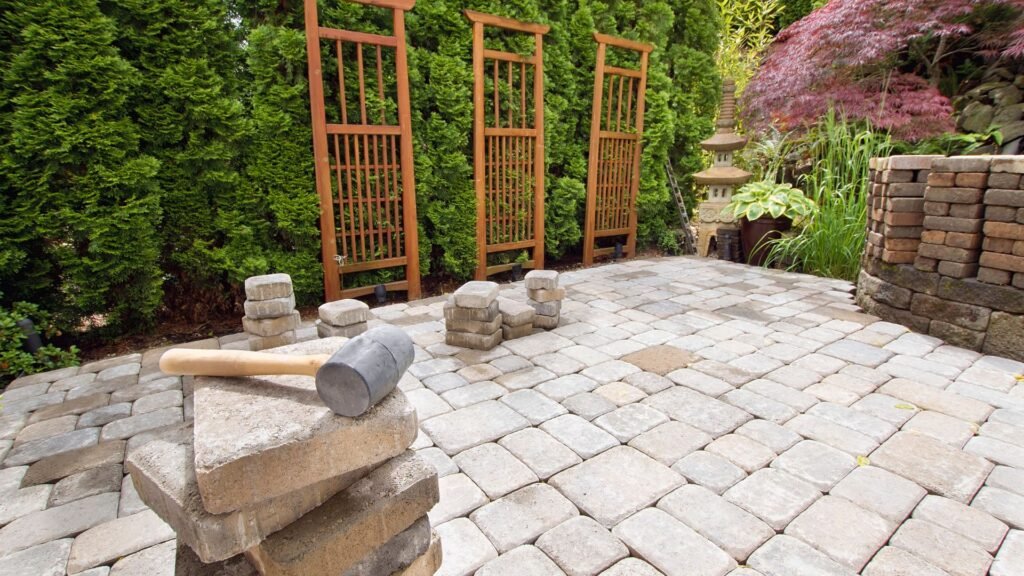
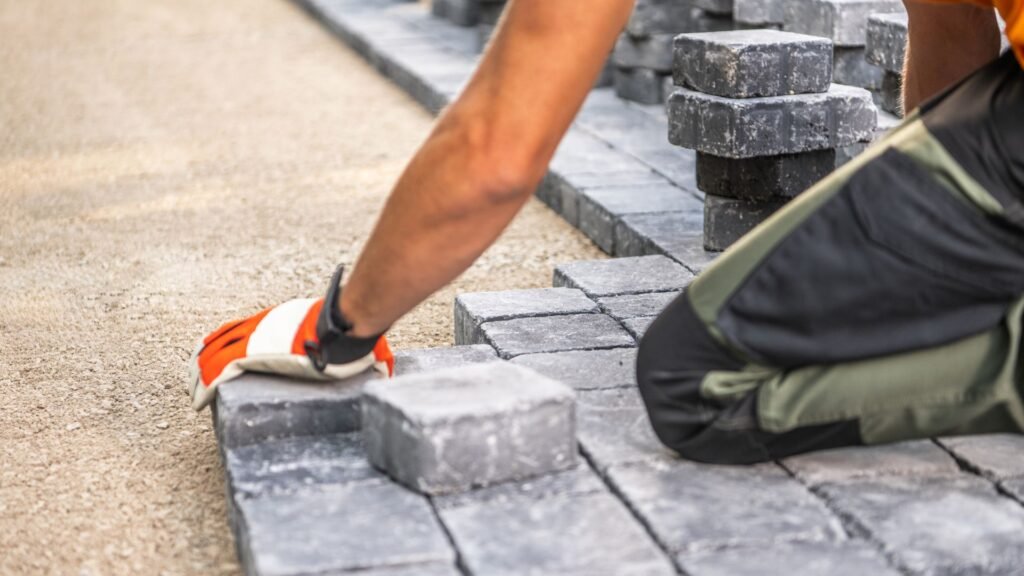
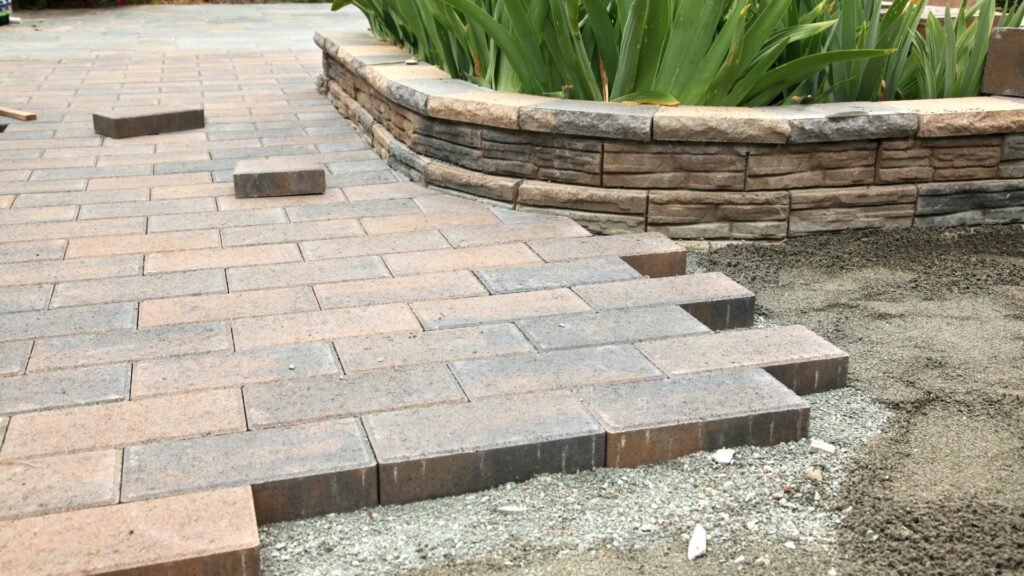
How To Prepare A Concrete Base For Pavers (Step-By-Step)
Getting the concrete base right is one of the most important parts of any paving project. A solid base keeps your pavers flat, supports heavy loads, and prevents shifting or cracking over time. Whether you’re building a patio, path, or driveway, following the correct process ensures the job lasts for years. Below is a full breakdown of how to prepare a concrete base for pavers, using simple steps and tools most DIYers can handle.
Tools And Materials Needed
Before you start, gather everything you’ll need. This keeps the process smooth and avoids delays halfway through the job. Here’s a list of essentials:
- Shovel or spade
- Wheelbarrow
- Measuring tape
- String line and stakes
- Spirit level
- Plate compactor or hand tamper
- Wooden planks (for formwork)
- Nails or screws and a hammer or drill
- Concrete mix (20 MPa recommended)
- Water source and mixing container
- Float or trowel
- Gloves, boots, and safety glasses
If you’re working on a larger area, renting a concrete mixer and compactor will save time and effort.
Step-By-Step Instructions
Excavation
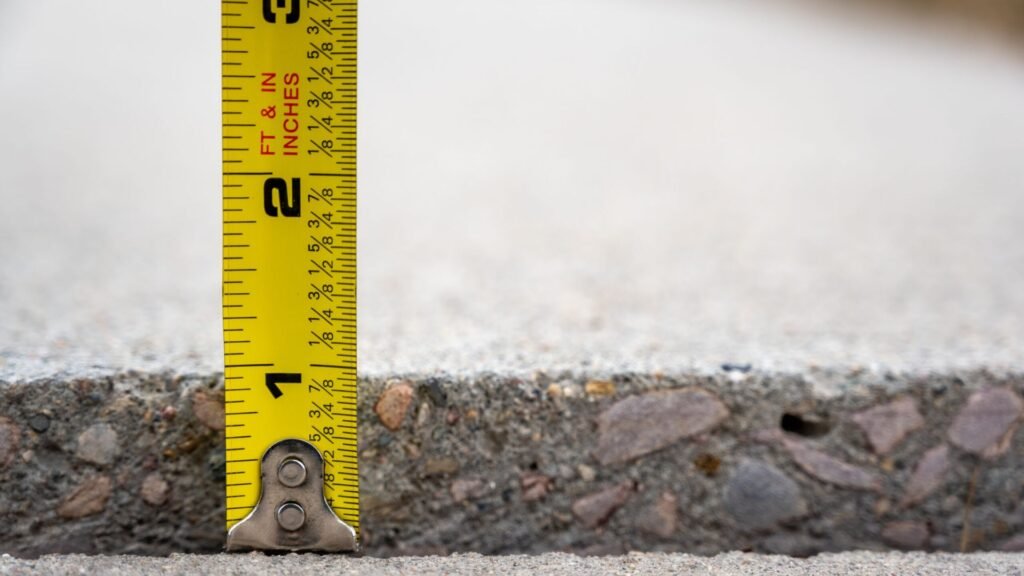
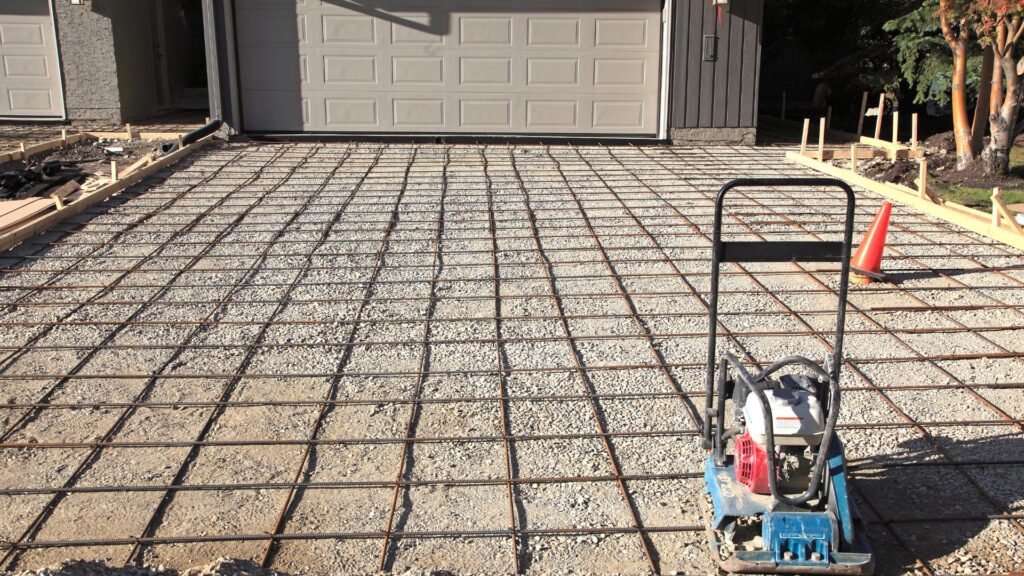
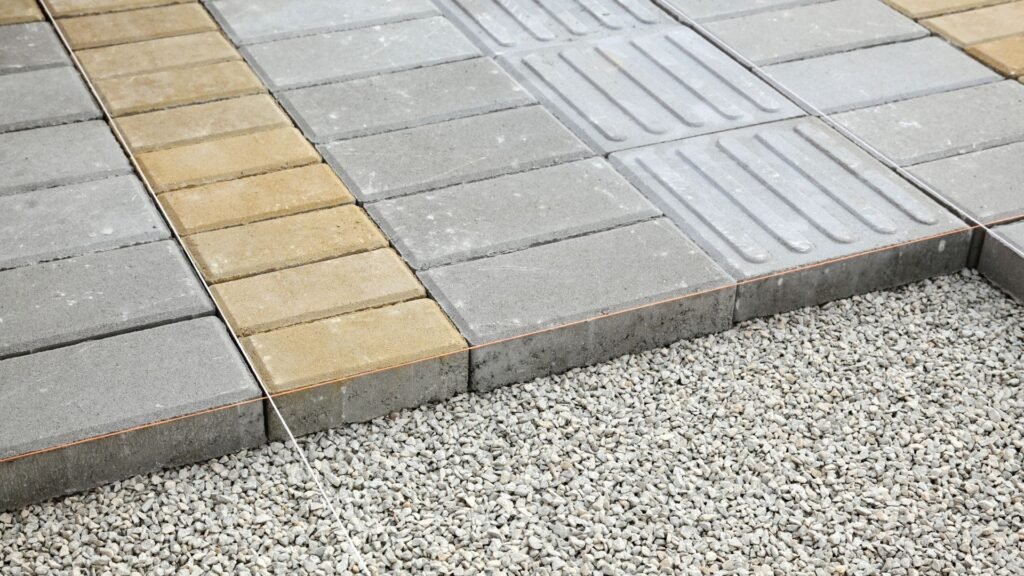
Start by marking the area where the pavers will go using string lines and stakes. Then, excavate the ground to a depth of around 150mm to 200mm, depending on the thickness of the concrete and pavers. Remove all grass, roots, and loose soil. Make sure the bottom is even and compact the soil well to avoid settling later.
Formwork
Formwork holds the concrete in place while it cures. Use timber boards to frame the excavated area. Ensure the edges are straight and the height matches your desired concrete level. Use a level to check the slope if you want water to drain away (usually a slight fall of 1-2%).
Secure the formwork with stakes and double-check measurements before pouring anything.
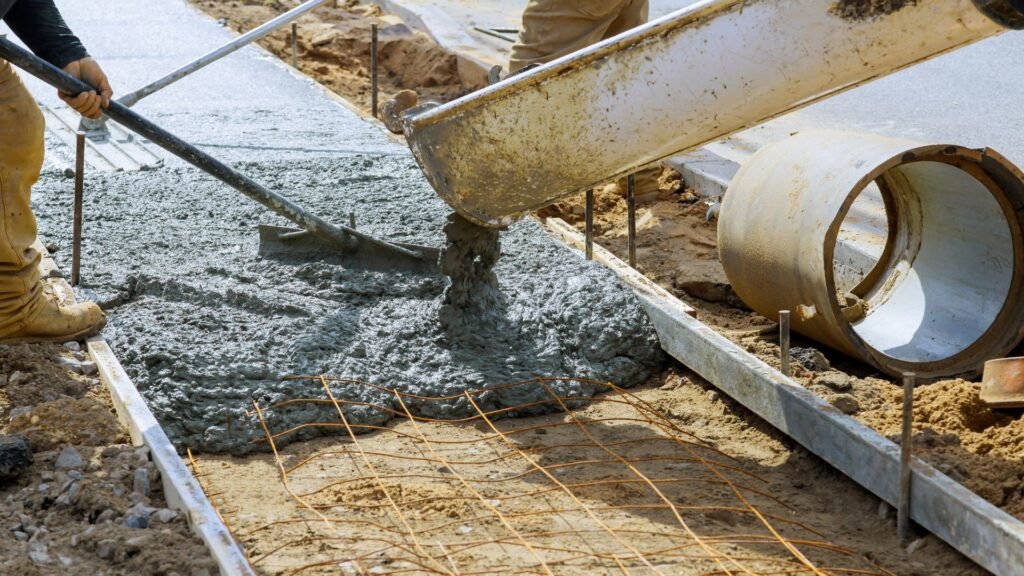
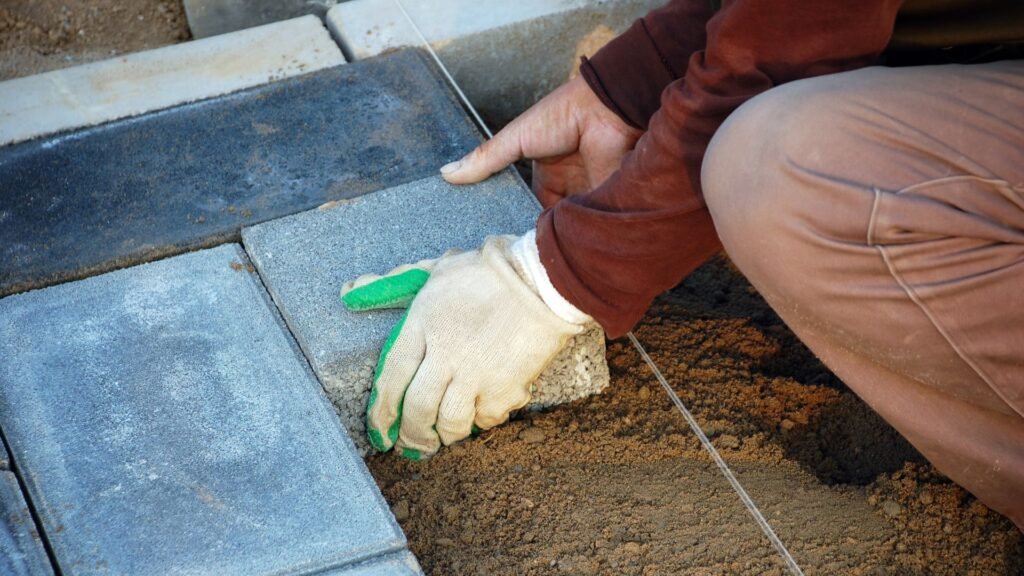
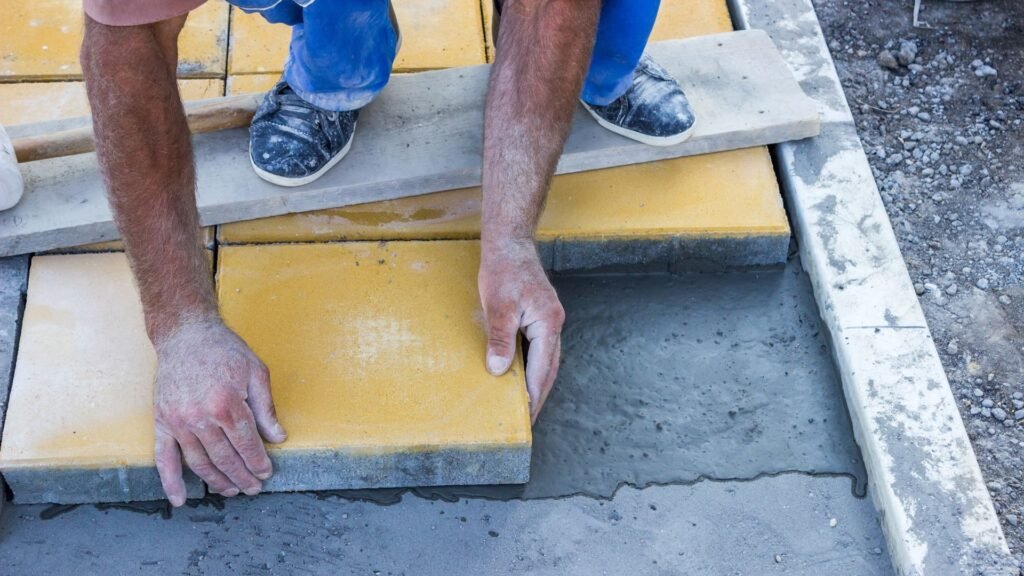
Laying And Leveling Concrete
Mix the concrete based on the package instructions, or use ready-mix if you have access. Pour it into the formwork evenly. Spread it out using a shovel or rake, then use a screed board to level the surface by running it across the top edges of the formwork.
After leveling, smooth the surface with a float or trowel. If you’re planning to lay pavers directly on top, leave a slightly rough surface to help them grip.
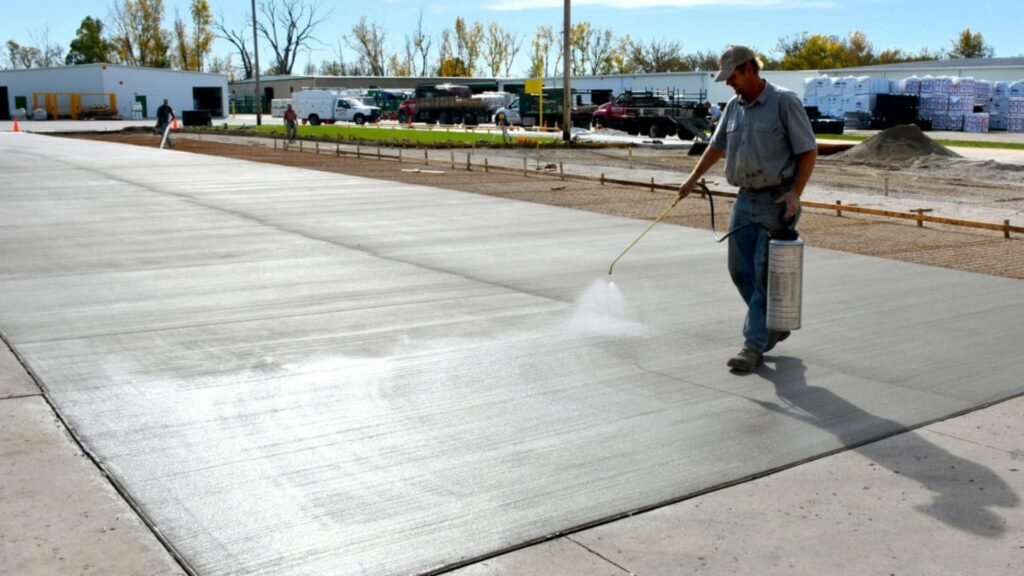
Curing Time
Let the concrete cure properly to gain full strength. For most projects, allow it to set for at least 7 days before walking on it and 28 days before placing heavy loads or driving over it.
Keep the surface damp for the first few days to prevent cracking. You can do this by misting it with water or covering it with plastic sheeting.
Safety Tips For Beginners
- Wear gloves, safety glasses, and closed-toe boots
- Mix concrete in a well-ventilated area
- Don’t rush the curing process, this affects durability
- Always check your level before pouring
Mistakes in the base will show in the final result, so take your time with each step.
Cost-Saving DIY Tips
- Compare prices between bagged and bulk concrete for your area
- Rent equipment like compactors instead of buying
- Reuse formwork timber for multiple projects
- Ask friends or family to help with labor, concrete sets fast, so more hands make a difference
By preparing a proper concrete base, you’re laying the groundwork for a long-lasting, professional-looking paving job. It’s the part most people skip or rush, but it’s also what makes the biggest difference in the final result. If you’re planning a DIY project, investing your time and effort here will save you money and repairs later.
Common Mistakes To Avoid
When preparing a concrete base for pavers, a few common mistakes can lead to major issues down the line. These errors often result in uneven surfaces, cracked pavers, or expensive repairs. Avoiding them can save you time, money, and frustration, especially in New Zealand, where weather and ground conditions can add extra challenges.
- Pouring On Soft Soil
One of the biggest mistakes is pouring concrete directly onto soft or loose soil. Without a solid foundation, the concrete can shift, settle unevenly, or even crack. Always excavate the area to a stable depth and check that the sub-base is firm and well-drained. If you’re unsure, walk over the area, if your feet sink, the soil needs more preparation. Consider laying a layer of compacted crushed rock or gravel before pouring concrete to improve stability. - Skipping Compaction
Compaction is not optional, it’s critical. Skipping this step can lead to weak spots in the base, causing your pavers to move or sink over time. Use a plate compactor or hand tamper to compact the soil and any gravel layers thoroughly. A properly compacted base resists moisture buildup, reduces movement, and supports the weight of pavers, vehicles, or foot traffic. Always compact in layers for the best result. - Not Allowing Enough Curing Time
Concrete needs time to cure properly. Rushing this process can weaken the final result. In New Zealand’s cooler or damp climate, it’s especially important to give your concrete enough time to dry and harden. Avoid placing pavers on freshly poured concrete or walking on it too soon. Wait at least 7 days for light loads and up to 28 days for full curing before applying any significant weight. Covering the slab with plastic can also help it cure evenly and retain moisture during the early stages. - Using The Wrong Concrete Mix
Choosing the wrong concrete mix can affect strength, durability, and how well it bonds with your pavers. A common mistake is using a weak mix for driveways or load-bearing areas. Always check the strength rating, look for a 20 MPa mix or higher for outdoor paving. If you’re unsure, ask at your local supplier. Some mixes are also designed for fast setting or better performance in wet conditions, which can be ideal for New Zealand’s variable weather.
By avoiding these mistakes and following best practices, you’ll create a stable, long-lasting base that keeps your pavers in place and looking great for years. Investing a bit more time and care during the preparation phase pays off with fewer headaches later.
Where To Buy Concrete For Pavers In NZ
Finding the right concrete for your paving project starts with knowing where to buy it and how much you’ll need. In New Zealand, there are several trusted suppliers that offer reliable concrete options suitable for everything from patios to driveways. Whether you’re tackling a small DIY job or planning a larger outdoor project, getting the right mix at the right price will save you time, money, and hassle.
Major Suppliers To Consider
In NZ, most homeowners turn to well-known stores like Mitre 10 and Bunnings for ready-mix concrete bags. These stores are widely accessible and offer affordable options for smaller projects. You can also choose from larger-scale suppliers like Firth and Holcim, which provide bulk concrete and tailored mixes for bigger or commercial jobs.
- Mitre 10: Offers pre-mixed bags (20–30 kg) ideal for small-scale paving. Brands like Rapid Set or Dricon are common.
- Bunnings: Carries a similar range, including quick-set and standard concrete mixes. They also provide online calculators to help you estimate quantities.
- Firth: A trusted NZ supplier known for custom concrete solutions, bulk orders, and delivery for larger-scale paving jobs.
- Holcim: Supplies ready-mix concrete and specialty blends for residential and commercial use, often preferred by contractors.
Concrete Price Ranges In NZ
The cost of concrete in New Zealand depends on the quantity and type you need.
- Bagged Concrete Mix: Prices range from $10 to $20 per 20kg–30kg bag, depending on the brand and features (e.g., fast set, high strength).
- Bulk Concrete (By Cubic Metre): For larger pours, expect to pay $250 to $350 per m³. This usually includes delivery, but prices can vary by region and supplier.
- Delivery Fees: Many bulk suppliers add a delivery charge if you’re outside main service areas, so factor that into your budget.
If you’re laying a small garden path or a few pavers, a few bags from your local hardware store will do. For larger driveways or patios, ordering in bulk is more cost-effective.
How To Calculate The Amount Of Concrete You Need
To avoid under-ordering or wasting money on excess, it’s important to estimate the concrete volume accurately. Use this basic formula:
Length × Width × Depth = Volume (in cubic metres)
For example, if you’re laying a 5-metre long, 2-metre wide area with a 100mm (0.1m) depth:
5 × 2 × 0.1 = 1.0 m³ of concrete needed
Add 10% extra to account for spillage or uneven ground:
1.0 m³ + 0.1 = 1.1 m³ total needed
If you’re using bagged concrete, check how much volume one bag covers. A 20kg bag generally covers about 0.01 to 0.012 m³, depending on the mix and water content. Divide your total needed volume by this coverage to figure out how many bags to buy.
Tip: Many supplier websites have concrete calculators, use these to double-check your numbers before making a purchase.
Whether you’re buying a few bags or a full load, knowing where to shop, what to expect on price, and how to measure your needs can make a big difference in the success of your paving project.
Expert Tips From Local Paving Pros
When it comes to laying pavers on concrete, local builders and landscapers in New Zealand know what works and what doesn’t. Their hands-on experience can save you time, money, and frustration, especially if you’re planning a DIY project or managing a home renovation. Here’s what they recommend to help your concrete base last longer and support your pavers effectively.
Use The Right Concrete Mix From The Start
One common mistake homeowners make is using weak or cheap concrete mixes that aren’t suitable for their location or load requirements. According to several NZ-based landscapers, a 20 MPa mix is the minimum you should consider. If you’re paving a driveway or an area that will hold heavy loads, upgrade to 25–30 MPa strength. This ensures the base holds up under pressure and won’t crack early.
Don’t Rush The Curing Process
A professional builder from Christchurch noted that many paving issues come from impatience. Concrete needs at least 7 days to cure before laying pavers, even longer in colder climates. If you walk or build over it too soon, the surface may weaken, leading to cracks and poor drainage. Always let the base cure properly before moving to the next step.
Compact The Base Soil Before Pouring
Long-term results often depend on what’s underneath the concrete. A Wellington-based landscaping team stressed the importance of soil compaction before pouring. If the soil is soft or loose, the concrete may shift or crack later. Use a plate compactor to create a firm, level surface before setting up your formwork.
Maintain A Slight Slope For Water Drainage
Proper drainage is another essential detail. Experts recommend building the concrete base with a slight fall, around 1–2 degrees, to prevent water from pooling. Without this, trapped moisture can seep into the pavers or cause erosion under the base. Over time, this leads to sinking or weed growth between pavers.
Keep Expansion Joints In Larger Areas
For concrete bases over 10 square metres, builders advise using expansion joints. These joints allow the concrete to expand and contract with temperature changes without cracking. You can use timber, foam, or purpose-built expansion strips to divide the surface during pouring.
Tips For Long-Term Maintenance
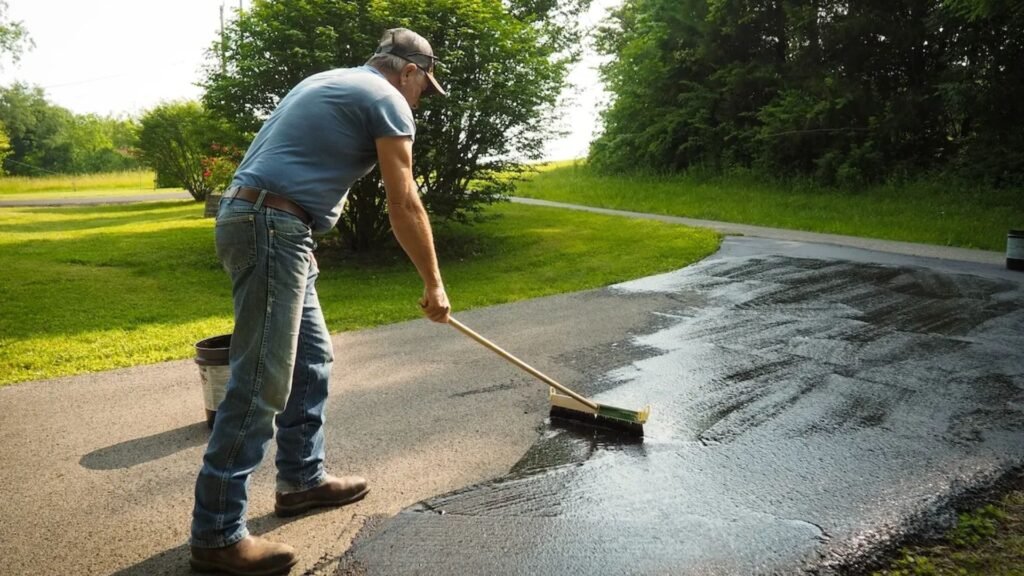
Maintaining your paved area starts with sealing the joints. Use a polymeric sand or sealant to lock the pavers in place and reduce weed growth. Every 12–18 months, check for any shifting or erosion around the edges. Sweep away debris and rinse the surface with a hose to keep it clean. Avoid using harsh chemicals or high-pressure washers that could damage the joint material.
If your paved area is in constant use, like a driveway or walkway, inspect it after extreme weather. Heavy rain or frost can affect the base, especially if the surrounding soil has moved or settled.
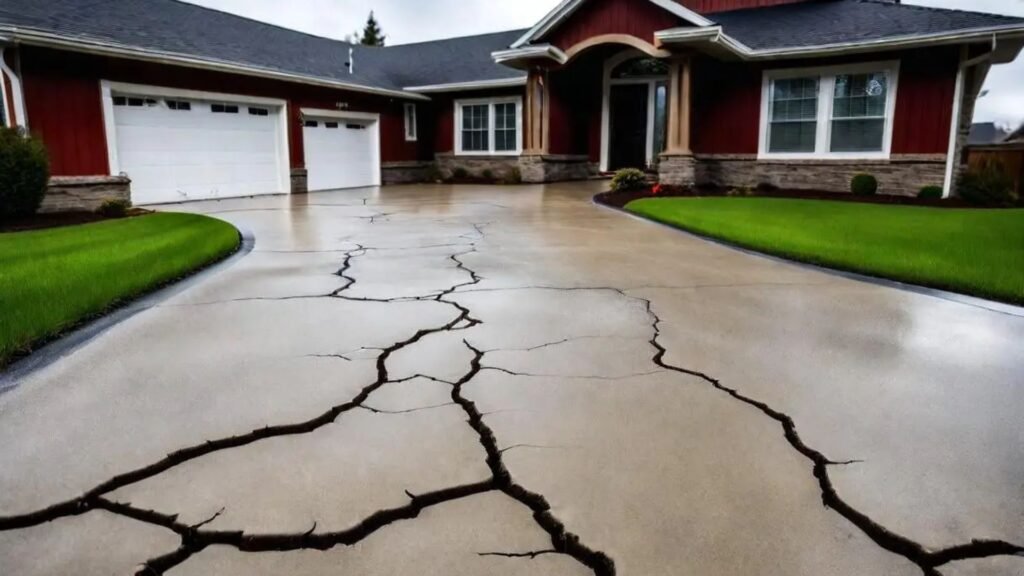
Signs You Need To Repair Or Replace A Concrete Base
Even with proper care, concrete can degrade over time. Look for these warning signs:
- Visible cracks across the surface, especially wider than 3mm
- Sinking or uneven pavers that no longer sit flat
- Water is pooling in specific areas
- Edges of the paved area breaking off or shifting
If you notice these signs, it may be time to lift the pavers and inspect the concrete underneath. Minor cracks can be patched with filler, but large damage or sunken areas often require full replacement. Local professionals suggest dealing with issues early to prevent more costly repairs later on.
By following advice from experienced New Zealand pros, you’ll extend the life of your concrete base and keep your pavers looking sharp and stable for years.
Need help choosing the right concrete for your paving project? Visit us to explore expert tips, trusted materials, and reliable services across New Zealand.
FAQs: About Concrete For Pavers In NZ
What type of concrete is best for pavers in NZ?
A standard 20 MPa concrete mix is best for most paver projects in New Zealand. It provides enough strength for patios, walkways, and driveways while handling NZ’s weather and soil conditions.
Can I lay pavers directly on concrete?
Yes, but it requires proper preparation. You’ll need a bonding layer like mortar or a sand bed over the concrete to keep the pavers stable and allow drainage.
How thick should the concrete base be under pavers?
For residential use, a 100mm (10cm) concrete base is usually enough. For driveways or heavy-use areas, aim for 125–150mm to support vehicle weight.
How long should concrete cure before laying pavers?
Let the concrete cure for at least 7 days before laying pavers. Full strength is typically reached at 28 days, but one week is safe for light applications.
Is concrete better than sand for a paver base?
Concrete is better for strength and durability, especially in high-traffic or wet areas. Sand is easier for small DIY projects but may shift over time.
Can I use pre-mixed concrete bags for paving?
Yes. Pre-mixed bags from NZ hardware stores like Bunnings or Mitre 10 are convenient for small jobs. Just follow the water ratio instructions carefully.
Do I need reinforcing mesh in the concrete base?
Reinforcing mesh is recommended for large areas or load-bearing sections like driveways. It helps prevent cracking and extends the lifespan of the base.
What tools do I need to lay a concrete base for pavers?
You’ll need a wheelbarrow, shovel, level, compactor, screed board, float, and formwork materials. For bigger projects, a concrete mixer can save time.
How much concrete will I need for my paving area?
To estimate volume, multiply length × width × depth (in metres). Example: 5m × 2m × 0.1m = 1 cubic metre. Add 10% for waste or errors.
Where can I buy concrete mix for pavers in NZ?
You can find quality concrete mixes at Bunnings, Mitre 10, Firth, and local landscaping suppliers. Look for 20 MPa-rated mixes for best results.
Conclusion
Concrete might take more time and effort upfront, but it delivers lasting results that hold up well in New Zealand’s weather and soil conditions. If you want a paving base that stays stable, handles heavy loads, and doesn’t shift or sink over time, concrete is worth considering. Before you start your project, take a moment to assess the size, location, and intended use of the area. A driveway will need a different base than a garden path or patio, so choosing the right foundation is key to avoiding costly fixes later. Whether you’re going the DIY route or hiring a contractor, making smart choices early on can save time and money. If you’re unsure what materials or mix strength to use, it’s a good idea to speak with a local supplier or contractor. For the best outcome, visit your nearby hardware store or contact a paving expert who can offer advice tailored to your space and soil type.
About the Author:
Mike Veail is a recognized digital marketing expert with over 6 years of experience in helping tradespeople and small businesses thrive online. A former quantity surveyor, Mike combines deep industry knowledge with hands-on expertise in SEO and Google Ads. His marketing strategies are tailored to the specific needs of the trades sector, helping businesses increase visibility and generate more leads through proven, ethical methods.
Mike has successfully partnered with numerous companies, establishing a track record of delivering measurable results. His work has been featured across various platforms that showcase his expertise in lead generation and online marketing for the trades sector.
Learn more about Mike's experience and services at https://theleadguy.online or follow him on social media: