Welcome to your comprehensive guide on how to repair an old cracked concrete driveway. If you’ve noticed unsightly cracks or uneven surfaces in your driveway, you’re not alone many homeowners face this common issue due to wear, weather changes, and the passage of time. While these cracks might seem intimidating, the good news is that with the right approach and a bit of effort, you can repair them yourself, saving both time and money. In this article, we’ll walk you through everything you need to know, from understanding the causes of cracks to choosing the right materials and tools, to ensuring your driveway looks and functions like new for years to come.
To repair an old cracked concrete driveway, start by cleaning the area thoroughly to remove dirt and debris. For small cracks, use a concrete filler, and for larger cracks, apply a patching compound after chiseling the edges to improve adhesion. Once the repairs are made, resurface the driveway for an even finish and seal it to protect against future damage. Regular maintenance and sealing will help extend the life of the repairs.
Table of Contents
Why Concrete Driveways Crack
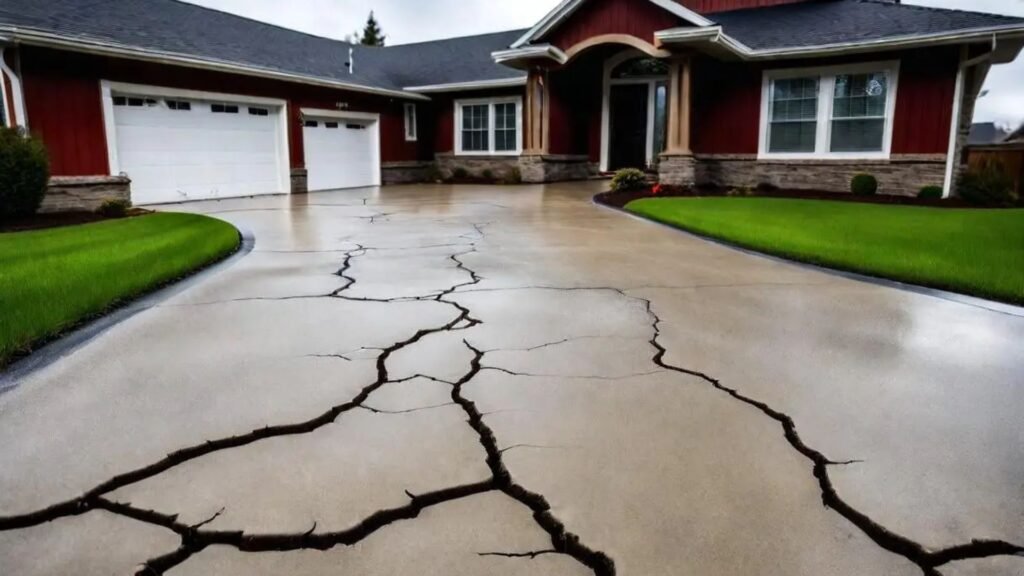
Concrete driveways are a popular choice for homeowners due to their durability and aesthetic appeal. However, even the most well-installed concrete surfaces can develop cracks over time. Understanding why these cracks form is essential for prevention and repair. Below, we’ll explore the common causes of driveway cracks, different types of cracks, and how they can worsen if left untreated.
Common Causes of Driveway Cracks
1. Weather and Temperature Changes (Freeze-Thaw Cycles)
One of the most frequent culprits behind concrete driveway cracks is the natural expansion and contraction caused by temperature fluctuations. In colder climates, freeze-thaw cycles are particularly problematic. Water enters the small pores of the concrete, and when temperatures drop, this water freezes and expands. As the ice forms, it puts pressure on the concrete, leading to cracks. When temperatures rise again, the ice melts, and the cycle repeats, causing further damage over time.
2. Soil Movement or Settlement Under the Driveway
The ground beneath your driveway plays a crucial role in maintaining its structural integrity. If the soil beneath the concrete settles unevenly or shifts, it can cause sections of the driveway to sink or shift as well. This movement creates stress on the concrete, leading to cracks. Poorly compacted soil during installation is a common factor that contributes to this issue. Additionally, natural soil settling over time can result in structural weaknesses.
3. Tree Roots Growing Underneath
Trees are beautiful additions to any property, but their roots can wreak havoc on concrete driveways. As tree roots grow and spread, they can push against the concrete from below, causing it to crack or lift. Even small cracks can emerge as a result of root growth, and if the issue isn’t addressed, the damage can become significant. This is especially common when large trees are planted too close to driveways.
4. Heavy Loads or Frequent Use
Concrete is a strong material, but it has its limits. Repeated exposure to heavy loads, such as cars, trucks, or recreational vehicles, can contribute to the formation of cracks over time. Even everyday use by multiple vehicles can cause wear and tear, particularly if the driveway wasn’t designed to handle such weight. Heavy equipment or construction vehicles parked on the driveway for extended periods can also exacerbate the problem.
Types of Cracks
1. Hairline Cracks vs. Deeper, Structural Cracks
Not all cracks are created equal. Hairline cracks are often small, thin lines that form on the surface of the concrete. These are typically cosmetic and don’t pose an immediate threat to the structural integrity of the driveway. On the other hand, deeper, structural cracks can signal a more significant problem. These larger cracks can compromise the overall stability of the driveway and may require professional repair.
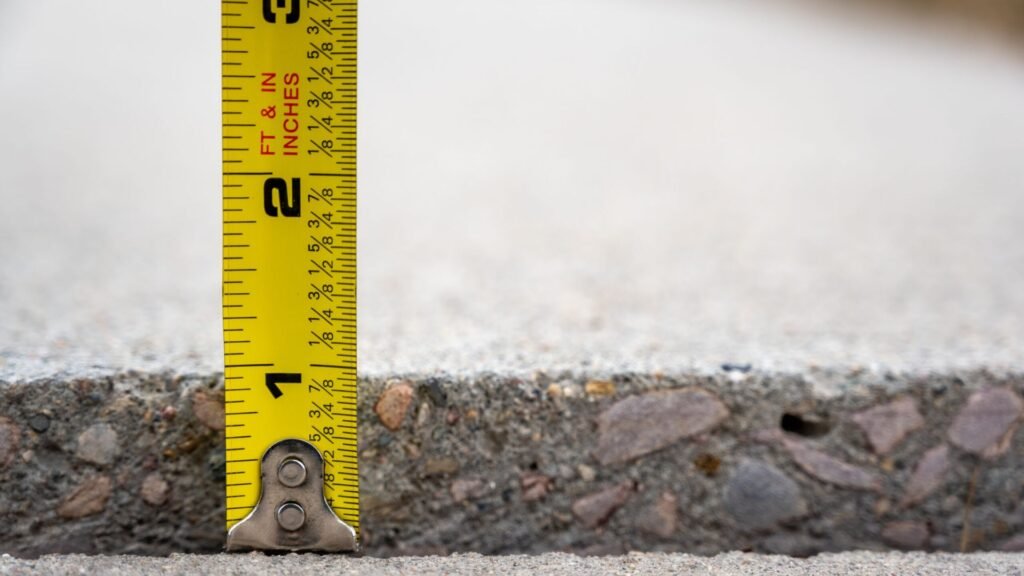
2. Distinguishing Between Cosmetic and Serious Damage
It’s important to differentiate between cracks that are merely cosmetic and those that indicate serious structural damage. Hairline cracks, while unsightly, usually don’t affect the performance of the driveway. However, cracks that are wider than a quarter of an inch, or those that penetrate deep into the concrete, may point to underlying issues like soil movement or excessive weight. These cracks are more likely to worsen over time if not addressed.
How Cracks Worsen Over Time
1. Water Infiltration Leading to Expansion
Once cracks form in a concrete driveway, they provide an entry point for water. When water seeps into these cracks and the temperatures drop, the freeze-thaw cycle comes into play again. The trapped water freezes and expands, pushing the crack open even further. Over time, this cycle can lead to more severe damage, and what began as a minor crack can develop into a significant structural issue.
2. Small Cracks Becoming Larger if Untreated
Ignoring small cracks can lead to much bigger problems down the road. Small cracks, while easy to overlook, act as a gateway for water and debris to penetrate the surface. Without proper maintenance or repair, these cracks will continue to grow larger due to the forces of nature, soil movement, and everyday wear and tear. What may have been a minor issue can eventually require costly repairs or even complete driveway replacement.
Understanding the causes and progression of cracks in concrete driveways is crucial for homeowners who want to protect their investments. Whether it’s due to temperature changes, soil movement, tree roots, or heavy loads, taking preventive measures and addressing cracks early can help maintain the integrity of your driveway and avoid more significant problems down the line.

Preparing To Repair Your Driveway
Assessing the Damage
Before jumping into any repairs, it’s essential to thoroughly inspect your driveway. This step helps you determine the extent of the damage and figure out the best approach for fixing it. Start by looking for visible cracks, holes, or sunken areas. Measure and note any problematic spots, paying attention to whether the damage seems superficial or more extensive.
Once you’ve completed your inspection, the next decision is whether you should tackle the repairs yourself or call in a professional. If the damage is minor such as small cracks or surface imperfections a DIY approach can be cost-effective and relatively simple. However, for more significant issues, like large cracks, deep potholes, or structural problems, professional expertise might be required. Attempting complex repairs without the right knowledge or equipment can result in further damage, costing you more in the long run.
Choosing the Right Materials and Tools
The success of your driveway repair hinges on using the appropriate materials and tools for the job. Different types of damage will require different products, and it’s essential to choose high-quality materials that are durable and designed for your specific driveway surface be it concrete or asphalt.
For small cracks, crack fillers work wonders, filling in gaps and preventing further damage. If your driveway has more widespread surface damage, a concrete resurfacer can rejuvenate the entire area. For potholes or more severe cracks, you’ll need patching compounds to provide a more robust fix.
Equally important are the tools you use. A caulking gun is crucial for applying crack filler precisely, while a trowel helps smooth and shape patching compounds. A wire brush or chisel will help you clear out loose debris, and a pressure washer ensures the surface is clean before applying any repair products. High-quality tools not only make the job easier but also ensure a more professional finish, which can help extend the life of your repairs.
Safety Precautions
Safety should be your top priority when working on any home improvement project, and driveway repair is no exception. Many repair materials, such as sealants or patching compounds, contain chemicals that can be hazardous if proper precautions are not taken.
Always wear protective gear, including gloves to protect your hands from harsh chemicals and sharp debris, and goggles to shield your eyes from dust and splashes. If you’re working with any chemical-based products or are in an enclosed space, ensure you have proper ventilation to avoid inhaling harmful fumes. Depending on the extent of the work, you may also want to wear knee pads for added comfort and support.
By planning carefully and taking these safety measures seriously, you’ll not only repair your driveway more effectively but also protect yourself from unnecessary injury or harm.
Repairing your driveway doesn’t have to be an overwhelming task. By assessing the damage, choosing the right materials, and prioritizing safety, you can confidently move forward with your project. Proper planning will not only ensure a smoother repair process but also give you a durable, long-lasting result.

How To Repair Small Cracks In A Concrete Driveway
Over time, concrete driveways can develop small cracks due to weather changes, regular wear, and natural settling. These cracks might seem minor, but addressing them early is essential to prevent them from expanding, which could lead to more significant damage. In this guide, we’ll walk you through the process of repairing small cracks in your concrete driveway, ensuring it remains durable and visually appealing.
Step-by-Step Guide to Repair Small Cracks in Concrete
1. Clean the Area Thoroughly
Before you can repair any crack, it’s crucial to ensure the area is clean. Begin by removing any dirt, dust, and debris from the crack using a wire brush. For more stubborn grime, a pressure washer can be highly effective. A clean surface ensures the filler adheres properly to the crack, creating a lasting repair.
2. Prep the Crack
Widen the crack slightly with a chisel. This might seem counterintuitive, but it helps the filler bond effectively by giving it more surface area to adhere to. Creating a wider and slightly roughened space allows for a better, stronger hold once the filler is applied.
3. Apply the Filler
Select a high-quality concrete crack filler designed for small cracks. Squeeze or pour the filler directly into the crack, ensuring it fills the space. You can find these fillers at any home improvement store, and many are available in squeeze bottles for easy application. Make sure to distribute the filler evenly throughout the crack to avoid air bubbles or uneven surfaces.
4. Smooth the Surface
Once the crack is filled, use a trowel to level the surface of the filler. Smoothing it out ensures that the filled crack blends seamlessly with the rest of the driveway. This step is vital for both aesthetic reasons and to prevent the crack from being noticeable after the repair.
5. Let the Filler Cure
After applying and smoothing the filler, give it ample time to dry and cure completely. The curing time will depend on the type of filler used, but it’s generally a good idea to avoid walking or driving over the repaired area for at least 24 hours. This ensures the filler hardens properly, providing a durable fix.
Expert Tips for Repairing Small Cracks in Your Driveway
- Repair on a Dry, Sunny Day: Concrete fillers bond best in dry conditions, so aim to repair cracks when the weather is sunny and rain-free. This will also speed up the drying and curing process.
- Match the Filler Color: Many concrete fillers come in different shades, so choose one that closely matches your driveway. This will help the repaired area blend with the rest of the surface, providing a seamless finish.
- Prevent Future Cracks: After the repair, consider sealing your driveway to protect it from moisture, temperature changes, and other external factors that cause cracks. A good concrete sealant can extend the life of your driveway and reduce future repairs.
By following these steps and tips, you can easily fix small cracks in your concrete driveway, keeping it strong and looking great for years to come. Regular maintenance, including timely crack repairs, will save you time, money, and hassle in the long run, as it prevents minor damage from turning into major issues.
Maintaining a crack-free driveway not only improves curb appeal but also enhances the overall durability of your property. So, the next time you spot a crack, don’t delay follow this simple guide and take care of it right away.

How To Repair Larger Cracks Or Sunken Areas
If you’re dealing with larger cracks or sunken areas in your concrete surfaces, addressing them properly is essential for ensuring longevity and preventing further damage. In this guide, we’ll walk you through an easy-to-follow process for fixing these issues effectively.
Step-by-Step Guide to Repairing Larger Cracks in Concrete
1. Clean the Area Thoroughly
Before beginning any repair work, it’s critical to clean the damaged area. Remove all dirt, debris, loose concrete, and any vegetation that may have grown within the crack. This ensures that the patching material adheres better and creates a more durable repair. A stiff-bristled brush, vacuum, or even a pressure washer can be used to thoroughly clean the crack.
2. Undercut the Crack
To help the patching material bond better with the surrounding concrete, you’ll need to undercut the edges of the crack. This can be done using a hammer and chisel. The goal is to create a V-shape groove along the crack. This V-shaped cut allows the patching compound to stay in place and form a stronger bond as it cures. The wider base also helps distribute any future stress more evenly across the repair.
3. Apply a Patching Compound
Now that the crack has been cleaned and undercut, you can begin filling it with a concrete patching compound or mortar mix. Be sure to follow the manufacturer’s instructions for mixing the patching material. Use a putty knife or trowel to press the compound firmly into the crack, ensuring that there are no air pockets.
4. Level and Smooth the Surface
Once the crack has been filled, take a trowel and smooth the surface of the patch so that it is level with the surrounding concrete. A smooth finish will not only look better but will also help prevent the patch from catching on anything and cracking again in the future. For deeper cracks, you may need to apply the patching compound in layers, allowing each layer to partially dry before adding the next.
5. Allow Ample Curing Time
Larger cracks require more time to cure fully. Depending on the size of the crack and the type of patching compound used, this process could take anywhere from a few days to a week. Be sure to keep the area protected from foot traffic, vehicles, and harsh weather during this period. Moisture or extreme temperatures can weaken the curing process and affect the longevity of the repair.
Fixing Sunken or Uneven Concrete Sections
Sunken or uneven areas are often a bigger concern than simple cracks, as they can indicate underlying issues such as soil erosion or settling. Here are the steps you can take:
1. Resurfacing Minor Sunken Areas
If the dip is relatively minor, you may be able to fix the issue with a resurfacing compound. This is applied to the entire surface of the concrete to create an even layer. Resurfacing not only levels out the sunken sections but also gives the entire slab a fresh appearance.
2. Mudjacking for Major Sunken Sections
For more significant sinking, the process of mud jacking or slab jacking may be required. Mudjacking involves drilling holes into the sunken slab and pumping a cement-like slurry underneath it. This mixture fills the voids beneath the concrete and raises the slab back to its original level. While this is a more complex process, it can be an effective solution for fixing sunken areas without replacing the entire slab.
3. When to Call a Professional
In cases where the sinking is severe or continues to worsen over time, it’s wise to consult a professional. Large-scale sinking often indicates deeper structural issues, such as extensive soil erosion or a poorly compacted foundation. An expert can assess the situation and recommend whether mud jacking, underpinning, or complete slab replacement is necessary.
Repairing larger cracks and sunken areas in concrete surfaces is a manageable task if done correctly. By following this step-by-step guide, you can extend the life of your concrete and prevent further damage. However, for major repairs or structural concerns, always consider seeking professional help to ensure the job is done safely and effectively.

Resurfacing The Entire Driveway For An Even Finish
Resurfacing your driveway can be a cost-effective and efficient way to give it a fresh, new appearance, while also extending its lifespan. If your driveway is showing signs of aging, such as widespread cracking or surface damage, resurfacing is a viable alternative to complete replacement. This process involves applying a new, thin layer of concrete over the existing surface, providing an even, smooth finish. In this section, we’ll explore why resurfacing is beneficial, and offer a step-by-step guide to help you achieve professional-looking results at home.
Why Resurface Your Driveway?
Over time, driveways naturally suffer from wear and tear due to exposure to weather, heavy vehicles, and general use. When the surface of your driveway becomes cracked, uneven, or worn out, resurfacing can restore it to like-new condition without the need for an expensive full replacement. Resurfacing offers an even finish that improves the overall appearance of your driveway while enhancing its durability. It’s especially effective for aging driveways that have minor to moderate damage but remain structurally sound.
Step-by-Step Guide to Resurfacing
1. Clean the Driveway: Before you begin resurfacing, it’s essential to thoroughly clean the surface. Use a pressure washer to remove any dirt, debris, oil stains, or remnants of old sealants. A clean surface allows the resurfacer to bond properly to the original concrete, ensuring a long-lasting, even finish.
2. Patch Large Cracks and Holes: Once the driveway is clean, inspect it for any significant cracks or holes. For larger imperfections, use a concrete patching compound to fill in the damage. This step is crucial, as resurfacing alone won’t hide deep cracks or major surface defects. Properly patching these areas ensures a smoother final result.
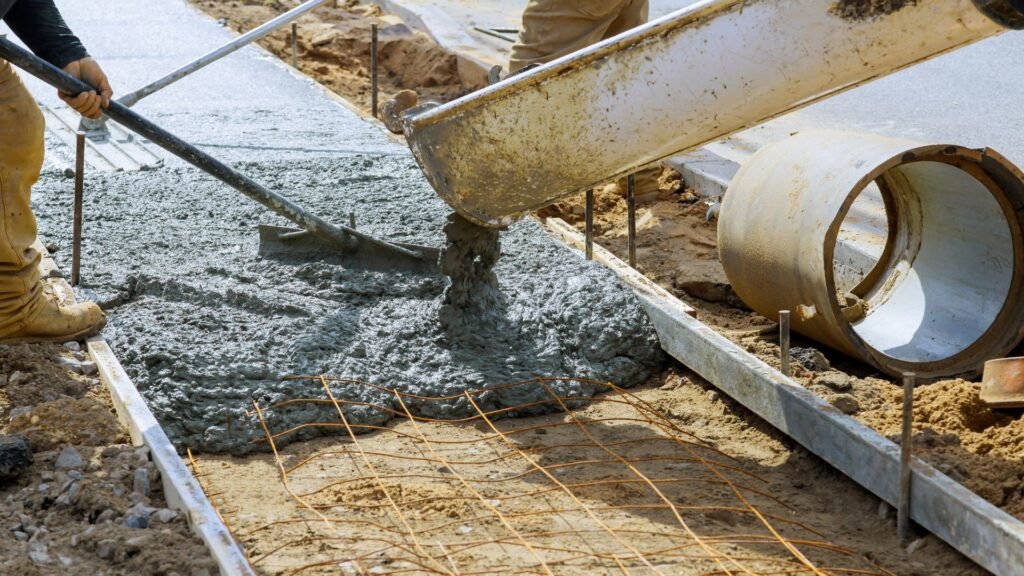
3. Apply the Resurfacer: After patching, it’s time to mix your concrete resurfacer according to the manufacturer’s instructions. Use a squeegee or a trowel to apply the resurfacer in sections, starting at one end of the driveway and working your way across. Make sure the resurfacer is spread evenly, maintaining a consistent thickness across the surface. This ensures that the final finish will be uniform.
4. Smooth the Surface: As you work in sections, take the time to smooth out the resurfacing. This can be done using a large trowel or a straightedge. Be sure to maintain the proper thickness while ensuring there are no air bubbles, ridges, or uneven spots. Smoothing the surface as you go will give your driveway that professionally resurfaced look.
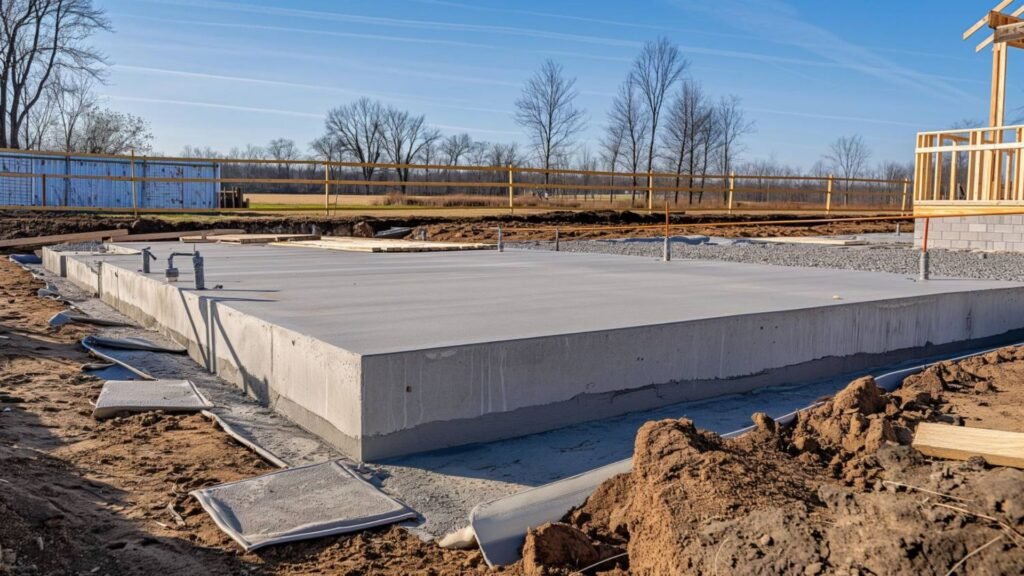
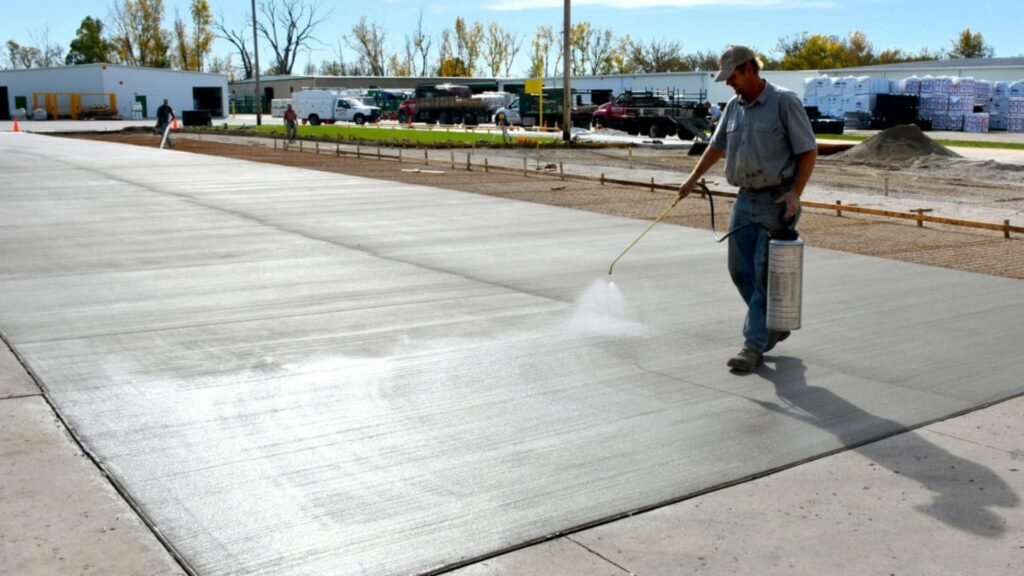
5. Curing and Sealing: Once the resurfacer has been applied, it’s important to allow the concrete to cure properly. Depending on the product you use, curing times may vary, so follow the manufacturer’s guidelines. After the driveway has fully cured, consider applying a concrete sealant. Sealing the surface adds an extra layer of protection, preventing water penetration, staining, and additional wear.
Tools and Materials Needed for Resurfacing
To successfully resurface your driveway, you’ll need a few key tools and materials:
- Pressure washer: For cleaning the surface.
- Concrete patching compound: To repair large cracks and holes.
- Concrete resurfacer: The material used to create the new surface layer.
- Squeegee or trowel: For spreading the resurfacer.
- Straightedge or large trowel: For smoothing the surface.
- Concrete sealant: To protect the finished surface.
Having the right tools and materials on hand will ensure that the resurfacing process goes smoothly, resulting in a professional finish.
Benefits of Resurfacing Over Spot Repairs
While spot repairs can be effective for fixing small problem areas, resurfacing offers several advantages for driveways with widespread wear. Resurfacing not only enhances the aesthetic appeal by creating a uniform, even finish, but it also increases the durability of the driveway. A resurfaced driveway will better withstand weather conditions and daily wear, resulting in longer-lasting results compared to individual patch jobs. Plus, resurfacing is typically quicker and less expensive than tearing out and replacing an entire driveway.
By choosing to resurface your driveway, you’re investing in both the appearance and longevity of your home’s exterior. It’s a practical solution that can give your driveway a fresh, clean look while providing the durability needed to last for years to come.

Sealing Your Driveway After Repair
Once you’ve successfully repaired your driveway, it’s crucial to seal the surface to protect the integrity of your work. This step can significantly prolong the life of your driveway, safeguarding it from the elements and preventing further damage. Here’s a detailed guide on why sealing is important, the best sealers to use, how to apply them, and how often you should reseal your driveway to keep it in top shape.
Why Sealing Is Important
Sealing your driveway after repair is more than just an aesthetic improvement it’s a functional one. The primary role of a sealer is to protect the repaired surface from external damage caused by moisture, UV rays, and temperature fluctuations. Unsealed driveways are prone to cracking, fading, and even more costly repairs down the line. By sealing, you create a protective barrier that:
- Prevents future cracks: Water, snow, and ice can seep into tiny cracks and expand, causing larger breaks in the asphalt or concrete. A quality sealer will block these elements, keeping your driveway crack-free.
- Extends the life of your repair: By preventing damage from the elements, sealing helps ensure that your recent repairs hold up over time, saving you from having to repeat the process too soon.
Choosing the Best Sealers
When it comes to selecting the right sealer for your driveway, there are a couple of options to consider, each with its unique benefits. The right choice depends on the specific needs of your driveway and the level of protection you want to achieve.
Acrylic Sealers
Acrylic sealers are popular for their versatility and ease of use. They are known for providing a solid layer of protection while enhancing the appearance of the surface. Acrylic sealers dry relatively quickly and are often favored for their UV resistance, which prevents the driveway from fading due to prolonged sun exposure.
Epoxy-Based Sealers
Epoxy-based sealers offer a more durable and long-lasting option. These sealers provide a tougher barrier that is highly resistant to wear and tear, making them ideal for driveways that experience heavy traffic. Epoxy-based products are also excellent for sealing against moisture, making them a top choice for regions with heavy rain or snow.
In addition to the type of sealer, consider the following features for enhanced protection:
- UV-Resistant Sealers: UV-resistant options are designed to shield the surface from harmful sun exposure, preventing fading and keeping the driveway looking fresh for longer.
- Waterproof Sealers: Waterproof sealers are excellent for areas prone to rain and snow, as they form a watertight barrier that prevents moisture from penetrating the surface, reducing the risk of cracks and damage.
How to Apply a Sealer
Sealing your driveway is a relatively simple process, but proper preparation and application are key to achieving a smooth and durable finish. Follow these steps for a professional-quality seal:
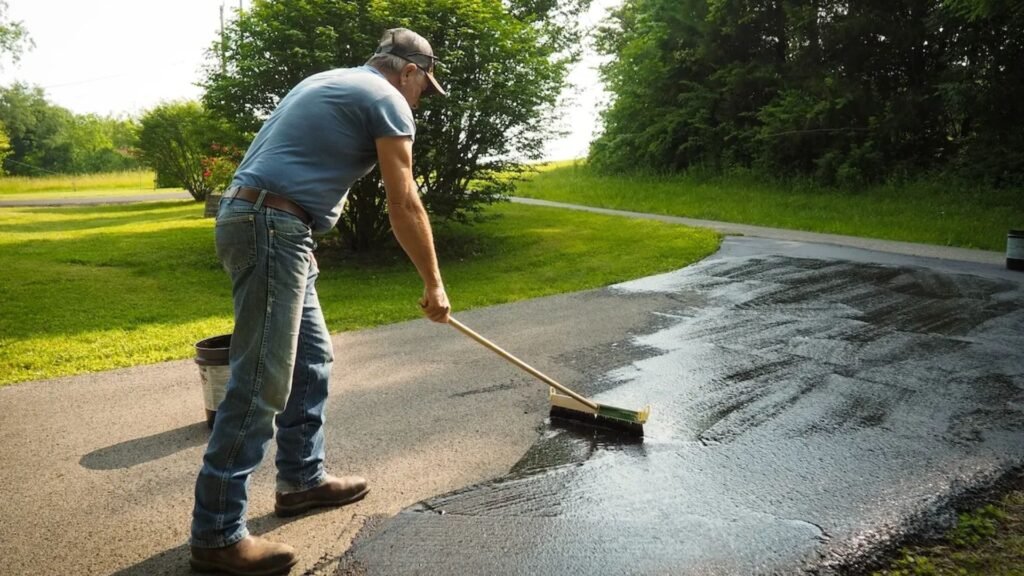
1. Clean the surface thoroughly: Before applying any sealer, ensure that the driveway is completely clean. Use a power washer or a stiff broom to remove dirt, debris, and loose particles. This step is critical because any contaminants left on the surface can interfere with the sealer’s adhesion.
2. Apply the sealer evenly: Depending on the type of sealer you choose, you can use either a roller or a sprayer to apply it. Rollers are ideal for smaller areas, while sprayers provide a more even application for larger driveways. Begin at one end of the driveway and work your way to the other, ensuring an even coat across the entire surface.
3. Allow the sealer to dry completely: After applying the sealer, allow ample time for it to dry. This drying period can vary depending on the type of sealer and the weather conditions, but generally, it takes 24-48 hours. During this time, avoid using the driveway to allow the sealer to fully cure and set.
How Often Should You Reseal Your Driveway?
To maintain your driveway’s condition and protect it from wear and tear, it’s recommended to reseal the surface periodically. As a general rule:
- Asphalt driveways: Should be resealed every 2-3 years. However, if you notice cracks or signs of wear earlier, don’t hesitate to reseal sooner.
- Concrete driveways: May need resealing every 3-5 years, depending on traffic and weather exposure.
Sealing your driveway is a vital step in extending its lifespan and maintaining its appearance. By choosing the right sealer and applying it correctly, you can ensure that your repairs stay intact and your driveway remains in excellent condition for years to come.

Preventing Future Cracks
Keeping your driveway in top condition requires proactive care and attention. Cracks are often inevitable over time, but with proper maintenance, you can significantly delay their appearance and reduce their severity. Here’s a comprehensive guide to preventing future cracks and keeping your driveway looking pristine.
Regular Cleaning and Inspection
One of the simplest yet most effective ways to prevent cracks from becoming a major issue is to maintain a regular cleaning and inspection routine. Dirt, debris, and oil stains can seep into the surface of your driveway, gradually weakening the material. This, combined with environmental factors like rain and sun exposure, accelerates wear and tear. By sweeping your driveway regularly and using appropriate cleaners for stains, you help prevent these contaminants from penetrating the surface. During cleaning, you’ll also have the opportunity to inspect the driveway closely, spotting small cracks before they worsen.
A quick visual inspection every few months can go a long way. Early detection of small fissures allows you to fix them promptly, which prevents them from expanding into larger, more expensive repairs. Keep an eye out for minor imperfections, and address them immediately to ensure they don’t evolve into major issues.
Dealing with Small Cracks Immediately
Minor cracks might seem harmless, but over time, they can lead to more extensive damage if left untreated. When moisture enters these cracks, it can freeze and expand during colder months, worsening the cracks through a process known as freeze-thaw damage. By addressing small cracks as soon as they appear, you prevent this cycle from starting. A quick application of a crack filler or sealer can stop moisture infiltration and prevent further deterioration. This proactive approach saves you both time and money in the long run.
Seasonal Maintenance Tips
Seasons can have a big impact on the condition of your driveway. As temperatures fluctuate, especially in regions with cold winters, your driveway may experience added stress. Here are some seasonal tips to protect your driveway:
- Preparing for Winter: Winter weather can be particularly harsh on driveways. Freeze-thaw cycles, where water enters cracks and freezes, can cause significant damage. To prepare your driveway for winter, make sure it’s clean and free of debris. Seal any visible cracks before the cold sets in to prevent water from seeping in. You may also consider applying a fresh coat of sealant to your entire driveway before the season begins, providing an additional protective layer against the elements.
- Avoiding Heavy Loads: Driveways are designed to bear significant weight, but parking in the same spot or placing heavy objects in one area for extended periods can cause stress to the surface. Over time, this can lead to cracks or depressions. Avoid parking heavy vehicles, such as trucks or RVs, in the same spot repeatedly. If possible, rotate parking locations to evenly distribute the load across the surface.
- Spring and Summer Care: The warmer months are a good time to assess any damage that may have occurred over the winter and take steps to repair it. In spring, inspect your driveway for any new cracks or erosion caused by winter weather and address them promptly. Additionally, summer is the ideal time to apply a sealant, as the warm temperatures allow the product to cure properly, providing maximum protection.
Long-Term Care
Consistent, long-term care is essential to keeping your driveway in top shape. Establishing an annual or bi-annual maintenance schedule will help you stay on top of repairs and prevent future cracks. Here are some key tips for long-term driveway care:
- Annual or Bi-annual Sealing: Sealing your driveway every one to two years provides a protective barrier that guards against moisture, UV rays, and the wear caused by daily use. This not only helps prevent cracks but also keeps the surface looking fresh and new.
- Drainage Management: Poor drainage can lead to water pooling on your driveway, which eventually seeps into cracks and weakens the surface. Ensure that water flows away from your driveway by checking the slope and cleaning out any nearby drainage systems. Good drainage can significantly reduce the likelihood of cracks developing over time.
- Routine Maintenance: Stay proactive by setting reminders for yourself to inspect and maintain your driveway regularly. By following a consistent maintenance routine, you’ll extend the lifespan of your driveway and avoid costly repairs down the line.
In conclusion, preventing future cracks in your driveway boils down to regular care and timely intervention. From cleaning and inspecting to addressing small cracks and preparing for seasonal changes, a little attention goes a long way. By incorporating these maintenance tips into your routine, you can keep your driveway in excellent condition for years to come.

FAQs: About How Do You Repair An Old Cracked Concrete Driveway
Can I repair concrete driveway cracks myself?
Yes, most small to medium-sized cracks in concrete driveways can be repaired by homeowners with the right materials and tools. For minor cracks, simple crack fillers are available, while larger cracks may require patching compounds. If you follow the step-by-step process outlined in this guide, you can effectively handle many repairs yourself. However, for severe damage or structural issues, it might be best to consult a professional.
What are the main causes of cracks in a concrete driveway?
Cracks in concrete driveways are typically caused by weather-related factors such as freeze-thaw cycles, soil movement or settlement, tree root intrusion, and excessive weight from vehicles. Over time, these stresses weaken the concrete, leading to cracking. Identifying the cause of your driveway’s cracks can help you choose the right repair method and prevent future issues.
What materials do I need to repair cracks in my concrete driveway?
The materials you need depend on the size of the cracks. For small cracks, a concrete filler and a caulking gun may suffice. For larger cracks, you will need a patching compound or concrete resurfacer, a trowel, a wire brush, a chisel, and potentially a pressure washer. If you plan to resurface the entire driveway, a concrete resurfacing product and sealer are recommended.
How long does it take to repair a cracked concrete driveway?
The time required to repair a driveway depends on the extent of the damage. Small cracks can be repaired in a few hours, while larger cracks or resurfacing projects might take a full day or more, especially if curing times are factored in. Most repairs need time to fully dry before the driveway can be used again, so expect the process to take at least 24-48 hours from start to finish, depending on the weather and curing conditions.
How do I know if a crack is serious or just cosmetic?
Cosmetic cracks are typically small, hairline cracks that do not compromise the structural integrity of your driveway. These can be easily filled and smoothed. Serious cracks are deeper, wider, and often accompanied by sunken or uneven areas. If you notice large gaps, or if the crack is part of a larger pattern of damage, you may be dealing with a more serious issue that requires more extensive repair or even professional help.
Can I repair cracks in cold or wet weather?
It’s best to repair cracks in dry, mild weather to ensure the materials are cured properly. Cold or rainy weather can hinder the effectiveness of fillers and patching compounds, as moisture may prevent proper adhesion or extend drying times. Aim to schedule repairs on a dry day with moderate temperatures for optimal results.
How long do driveway repairs typically last?
When done properly, driveway repairs can last for several years. Small crack repairs usually hold up well, but the longevity of the repair depends on the underlying cause of the crack and how well you maintain the driveway afterward. Sealing the driveway regularly and addressing small cracks promptly can extend the life of your repair significantly.
Is resurfacing better than just repairing cracks?
Resurfacing is a good option if your driveway has extensive cracking or surface damage but is structurally sound. Resurfacing provides a new, even layer of concrete, improving both appearance and durability. If the cracks are isolated and minor, spot repairs may be more cost-effective. Resurfacing is recommended when you want a more uniform look and longer-lasting results for an aging driveway.
How often should I seal my concrete driveway after repairs?
After completing repairs, it’s a good idea to seal your driveway to protect it from future damage. Generally, concrete driveways should be sealed every 2-3 years, but this depends on the type of sealer used, climate conditions, and the amount of traffic your driveway endures. Regular sealing helps to prevent cracks from reappearing and protects against water and UV damage.
Will the repaired area match the rest of my driveway?
While you can closely match the color of concrete fillers and patching compounds to the existing concrete, there may be slight differences in texture or color between the repaired area and the rest of the driveway. Resurfacing the entire driveway after repairs can help create a uniform look. Over time, as the concrete ages and weathers, the repaired areas may blend more seamlessly with the rest of the surface.
Conclusion
Repairing and maintaining an old cracked driveway is a task that can be accomplished with the right tools, knowledge, and approach. By following the steps outlined, including proper cleaning, filling cracks, and sealing, homeowners can restore their driveway’s functionality and appearance. It’s important to remember that while the process might seem daunting, it’s entirely manageable for the average DIY enthusiast. Take a moment to assess the current condition of your driveway and consider implementing these steps to extend its lifespan. If you’re unsure about tackling the project yourself, don’t hesitate to seek professional assistance or explore additional resources to ensure the job is done right.
About the Author:
Mike Veail is a recognized digital marketing expert with over 6 years of experience in helping tradespeople and small businesses thrive online. A former quantity surveyor, Mike combines deep industry knowledge with hands-on expertise in SEO and Google Ads. His marketing strategies are tailored to the specific needs of the trades sector, helping businesses increase visibility and generate more leads through proven, ethical methods.
Mike has successfully partnered with numerous companies, establishing a track record of delivering measurable results. His work has been featured across various platforms that showcase his expertise in lead generation and online marketing for the trades sector.
Learn more about Mike's experience and services at https://theleadguy.online or follow him on social media: